


Oil Painting for Beginners
Before we start painting, we need a clear plan and that starts with a reference photo.
A reference photo is simply an image you use to guide your painting.
It gives you direction for your composition, your colors, your lighting, and your shapes.
Instead of guessing or feeling stuck, a reference photo helps you paint with confidence, especially as a beginner.
You might already have a photo on your phone that you love.
You can sketch an idea yourself.
Or you can create a brand-new concept by combining images together into a mockup.
Your reference photo can come from anywhere.
🌟 Lesson Plan
In this lesson, I’m going to show you exactly how I create my reference photos and mockups using Canva.
I’ll be pulling images from Pinterest, adding in simple sketches, and arranging everything into a clear visual plan.
Once your reference is ready, I’ll walk you through the exact steps I use to sketch an image onto my canvas.
For this course, I’ll be walking you through two different mockups.
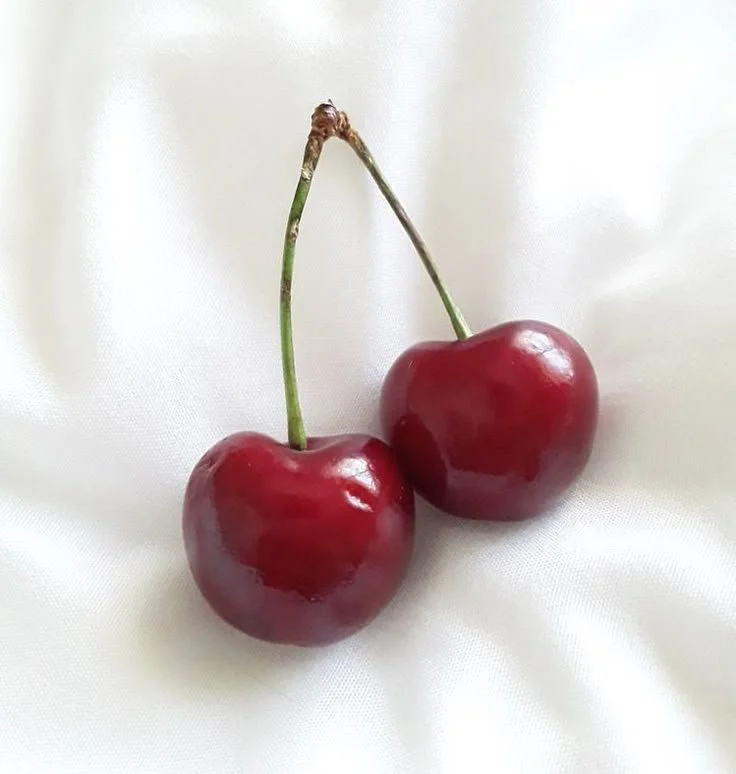
The first is a beginner-friendly mockup using a simple photo of a cherry. I found this image on pinterest and will upload this into canva so that it is sized correctly.
The second is a more advanced concept, inspired by a song called “Rollercoaster.” by Marina. This mockup is based on an idea I had visualized in my head while listening to the song.

No matter which type of reference you’re using — a photo, a sketch, or a collage — it’s important to bring your idea into a design program like Canva or Adobe Photoshop.
The reason for this is simple:
We’ll be using a projector to sketch the image onto your canvas, and your reference needs to be accurately sized to match your canvas dimensions.
Using software allows you to:
Resize your image to the exact canvas size
Adjust the composition easily
Keep everything proportional and stress-free
Let’s get started!
Creating Your Reference Photo
Step 1: You are going to create a Canva account. You can start with the free version and upgrade later if you feel like it.
Step 2: You're going to start by creating a new design in a custom size that matches the canvas you are using to paint on.
Step 3:
If you’re starting with a photo like I am with the 1st example, you can upload your image right into the software and resize it.
If you are using a hand sketch, you’ll want to take a photograph or scan your design to the device you are using and then upload it to your new design template.
If you are using images from pinterest to create a collage, you should be able to copy and paste images straight from pinterest to canva. In our more advanced example, I created the mockup by finding a bunch of images from pinterest that were related to what I visualized in my head. I dropped them into the template, removed the background and arranged it how I liked it. Feel free to play around with this.
Once your reference is ready, we’ll move on to projecting it onto your canvas.
Now that your mockup is ready and sized correctly in Canva, it’s time to get it onto your canvas using a projector.
Step 1: Place your canvas on an easel, a box, or anything sturdy — the important thing is that your canvas is standing perfectly parallel to the projector.
💡 Tip: If the canvas is leaning forward or backward, even just a little, the proportions of your mockup will look stretched or distorted. So take a second to make sure it’s straight and level.
Step 2: Plug in your projector, and make sure whatever device you’re using — your laptop, tablet, or phone — is connected to it. Once it’s connected, the projector will mirror whatever is on your screen.
Step 3: For the cleanest projection, I recommend presenting your mockup in full screen. In Canva, you can do this by clicking: Share → Present → Present Full Screen. This removes all the extra menus and just shows your mockup.
Step 4: Now you’ll position the projector so the image fits your canvas. This part takes a little fiddling, and that’s totally normal.
Keep in mind:
The closer the projector is to the canvas, the smaller — and often blurrier — the image becomes.
You may be able to adjust the focus depending on your projector, but some models stay a bit blurry no matter what.
And that’s okay. Even if it’s a little soft, you can still trace the main shapes and clean them up later.
Step 5: Once the projection is lined up with your canvas, grab your Stabilo pencil.
(Do NOT use regular graphite — it can smudge through your oil paint and be really hard to cover.)
I always start by tracing the main outlines of my object. After that, I go in and trace the important details — but not every tiny detail. You only need the shapes that will help you when you’re painting.
Transferring Your Image to Canvas
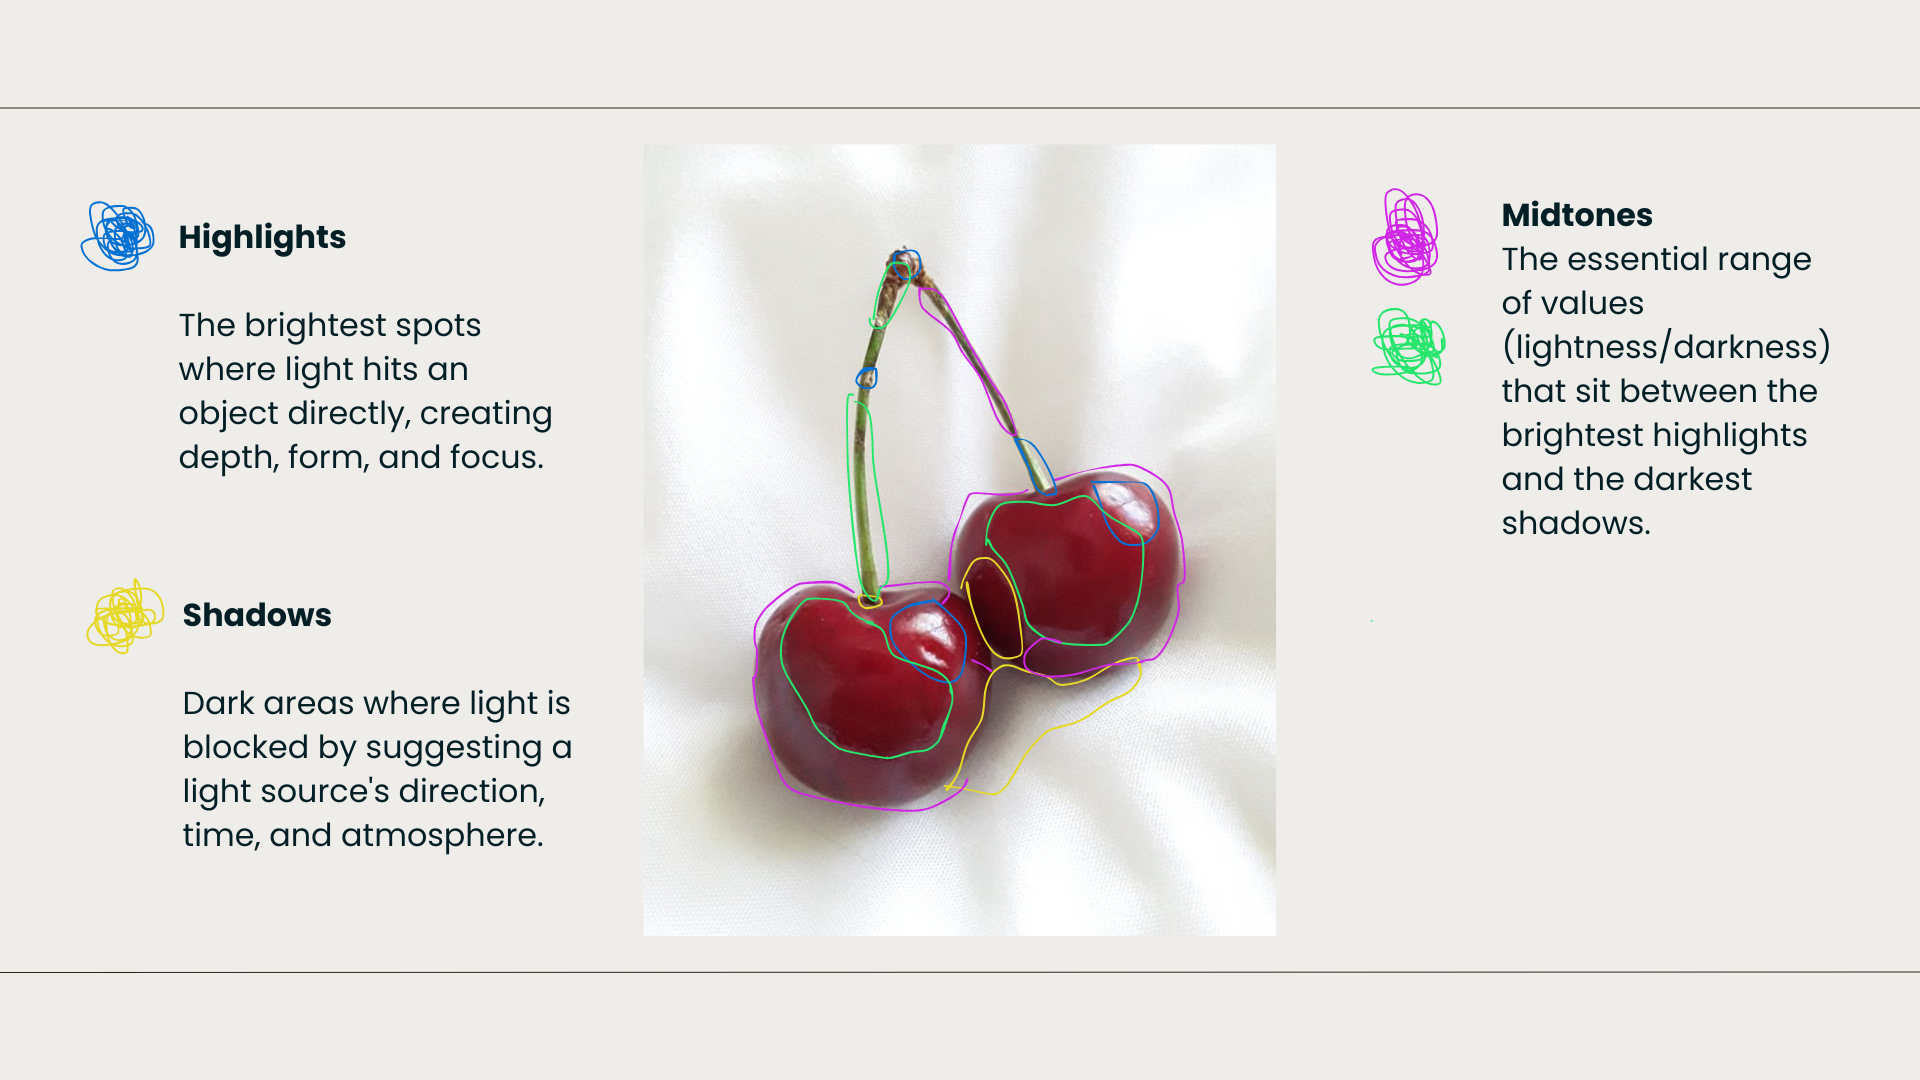
For example, in this cherry mockup, I’m tracing:
The highlight shapes — these bright white spots
The big shadow areas
And the midtone shapes
It’s important to start thinking of your image in terms of simple shapes instead of “a cherry” or “a flower” or “a face.” This is the exact way we’ll look at it when we start painting — breaking everything down into shadows, midtones, and highlights.
Once you’ve traced all of the shapes in your mockup, your sketch is officially ready.
You now have a clean, accurate sketch on your canvas, and we’re ready to move into the really fun part, which is painting! Meet me in the next chapter, where we’ll go over how to mix your paints and build your color palette.
Help Keep This Course Free
This course is completely free because I believe learning art should be accessible to everyone.
If these lessons have helped you and you’d like to support the creation of more free tutorials like this, you can leave a donation below. Every contribution helps me continue making educational content and improving this course for future artists.
Thank you so much for being here and supporting my work! It truly means more than you know.