


Oil Painting for Beginners
Welcome to the painting portion of the course. This is where everything we’ve learned so far comes together.
You’ve created your reference photo, sketched your design onto the canvas, and mixed your color palette. Now it’s time to start painting!
There is no single “right” way to paint. This is simply the method that helped me stay organized and confident when I was learning — and it works especially well for beginners.
Staining your Canvas (Optional)
A stain is a thin, transparent layer of diluted paint applied to the canvas before painting.
Some artists like to do this because it removes the bright white surface, which can feel overwhelming at first.
The benefits of staining include:
Making it easier to judge light and dark values
Reducing the intimidation of a blank white canvas
To stain your canvas, mix a small amount of paint with medium or solvent, brush it across the canvas, and wipe away the excess with a paper towel.
Personally, I never stain my canvas.
Once the white is covered, my brain feels like the painting is already “done,” and it throws me off a bit.
I recommend trying both and seeing what works best for you — there’s no right or wrong here.
One quick tip before we start:
If you’re left-handed like me, it helps to paint from right to left so you don’t accidentally drag your hand through wet paint.
If you’re right-handed, you’ll usually want to paint left to right. This small habit saves a lot of frustration.
We talked about paint consistency in the last lesson, but I want to quickly remind you here.
You want just enough paint to cover the white of the canvas — no more than that.
Too much paint can make blending difficult and cause muddy colors.
Too little paint will feel dry and streaky.
Think of the paint as smooth and buttery — not thick and not watery.
Before we start
Now we’re going to follow the same structure we used when sketching in chapter two.
We always paint:
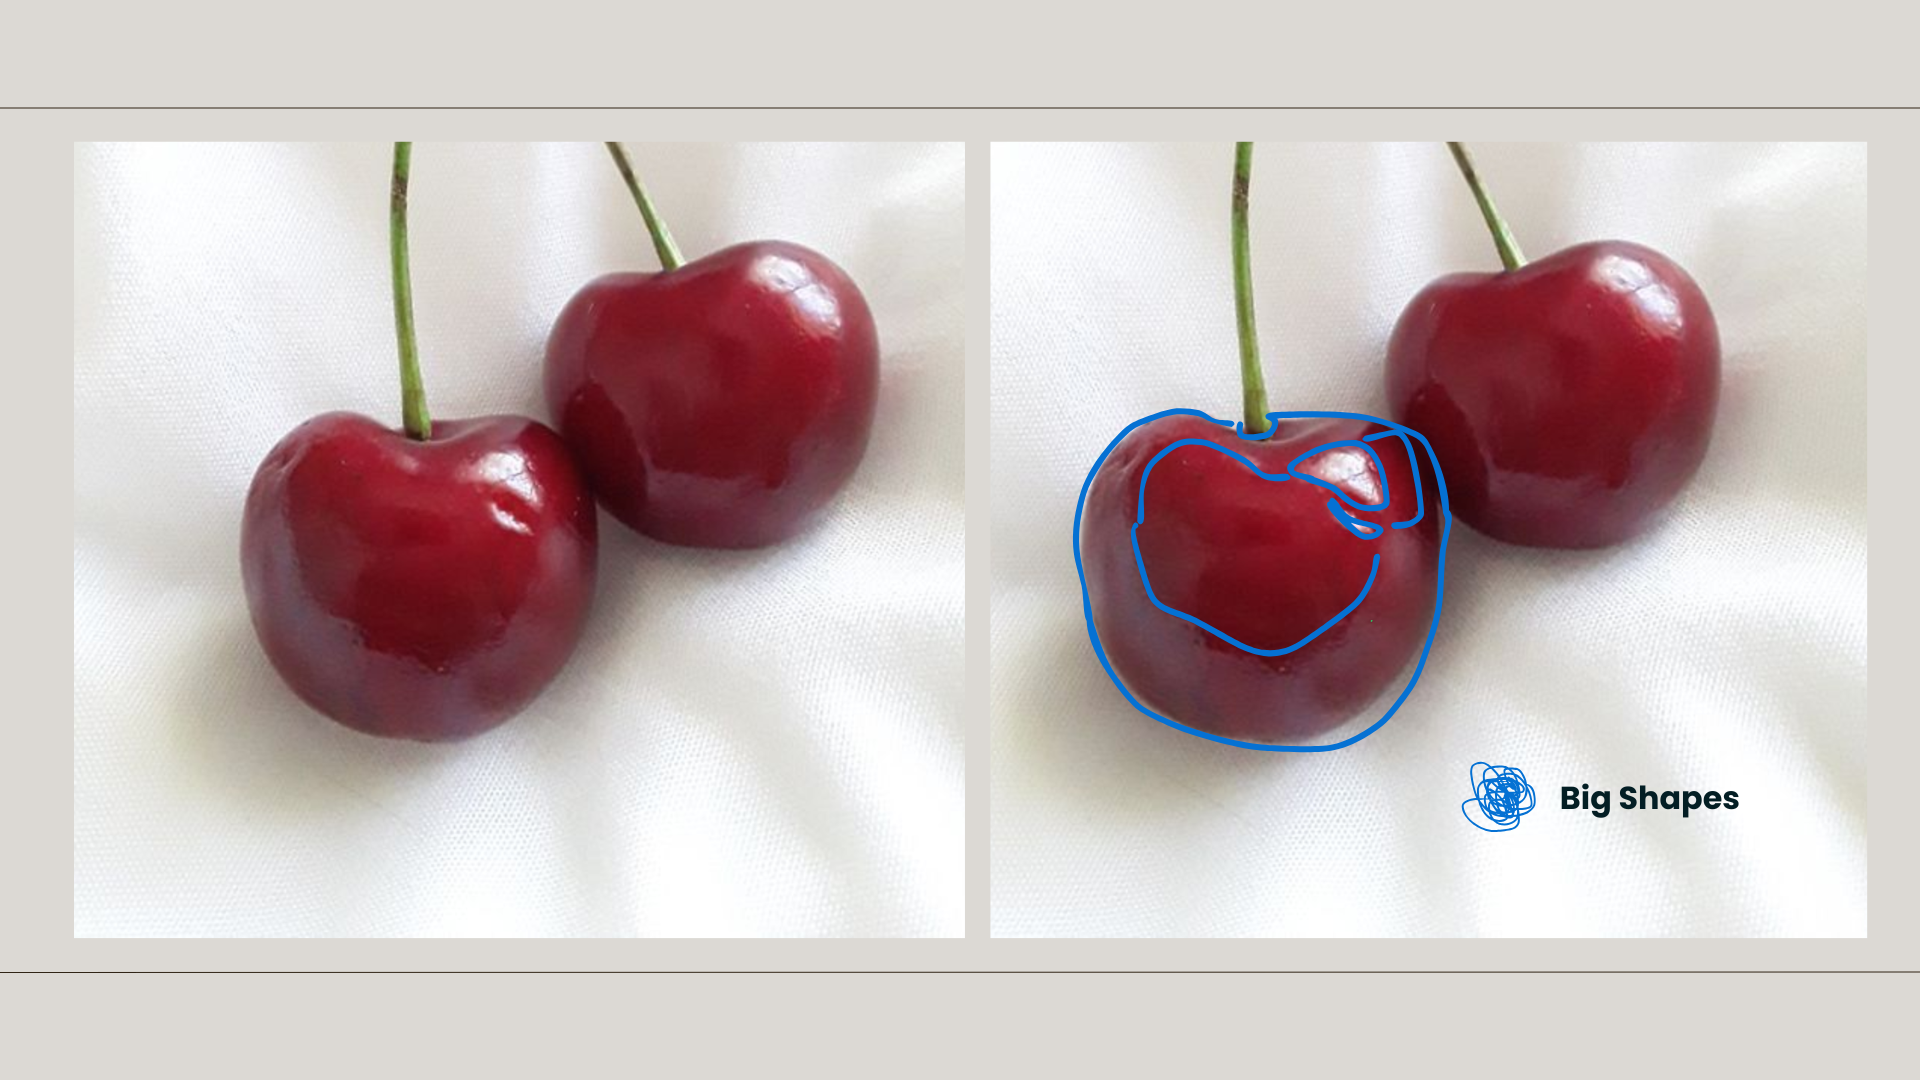
Big shapes first
Painting from your Reference Photo

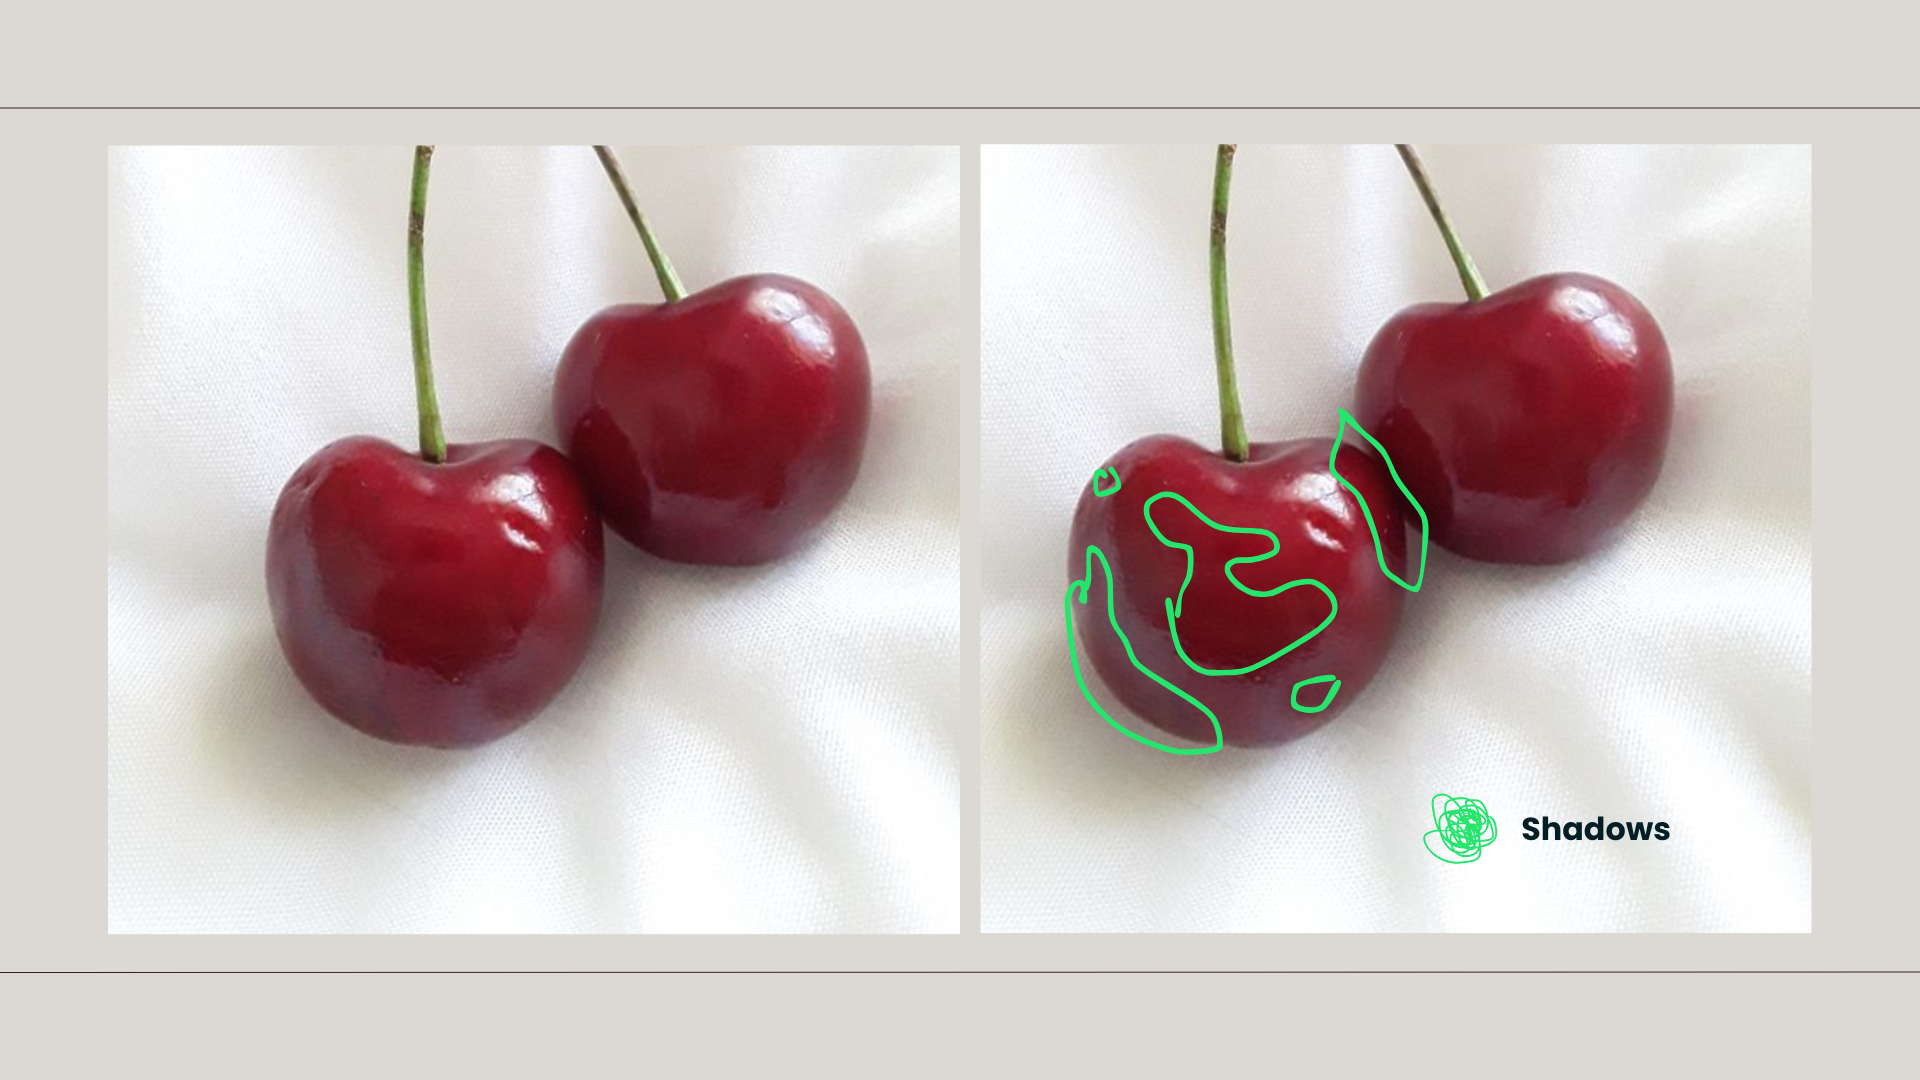
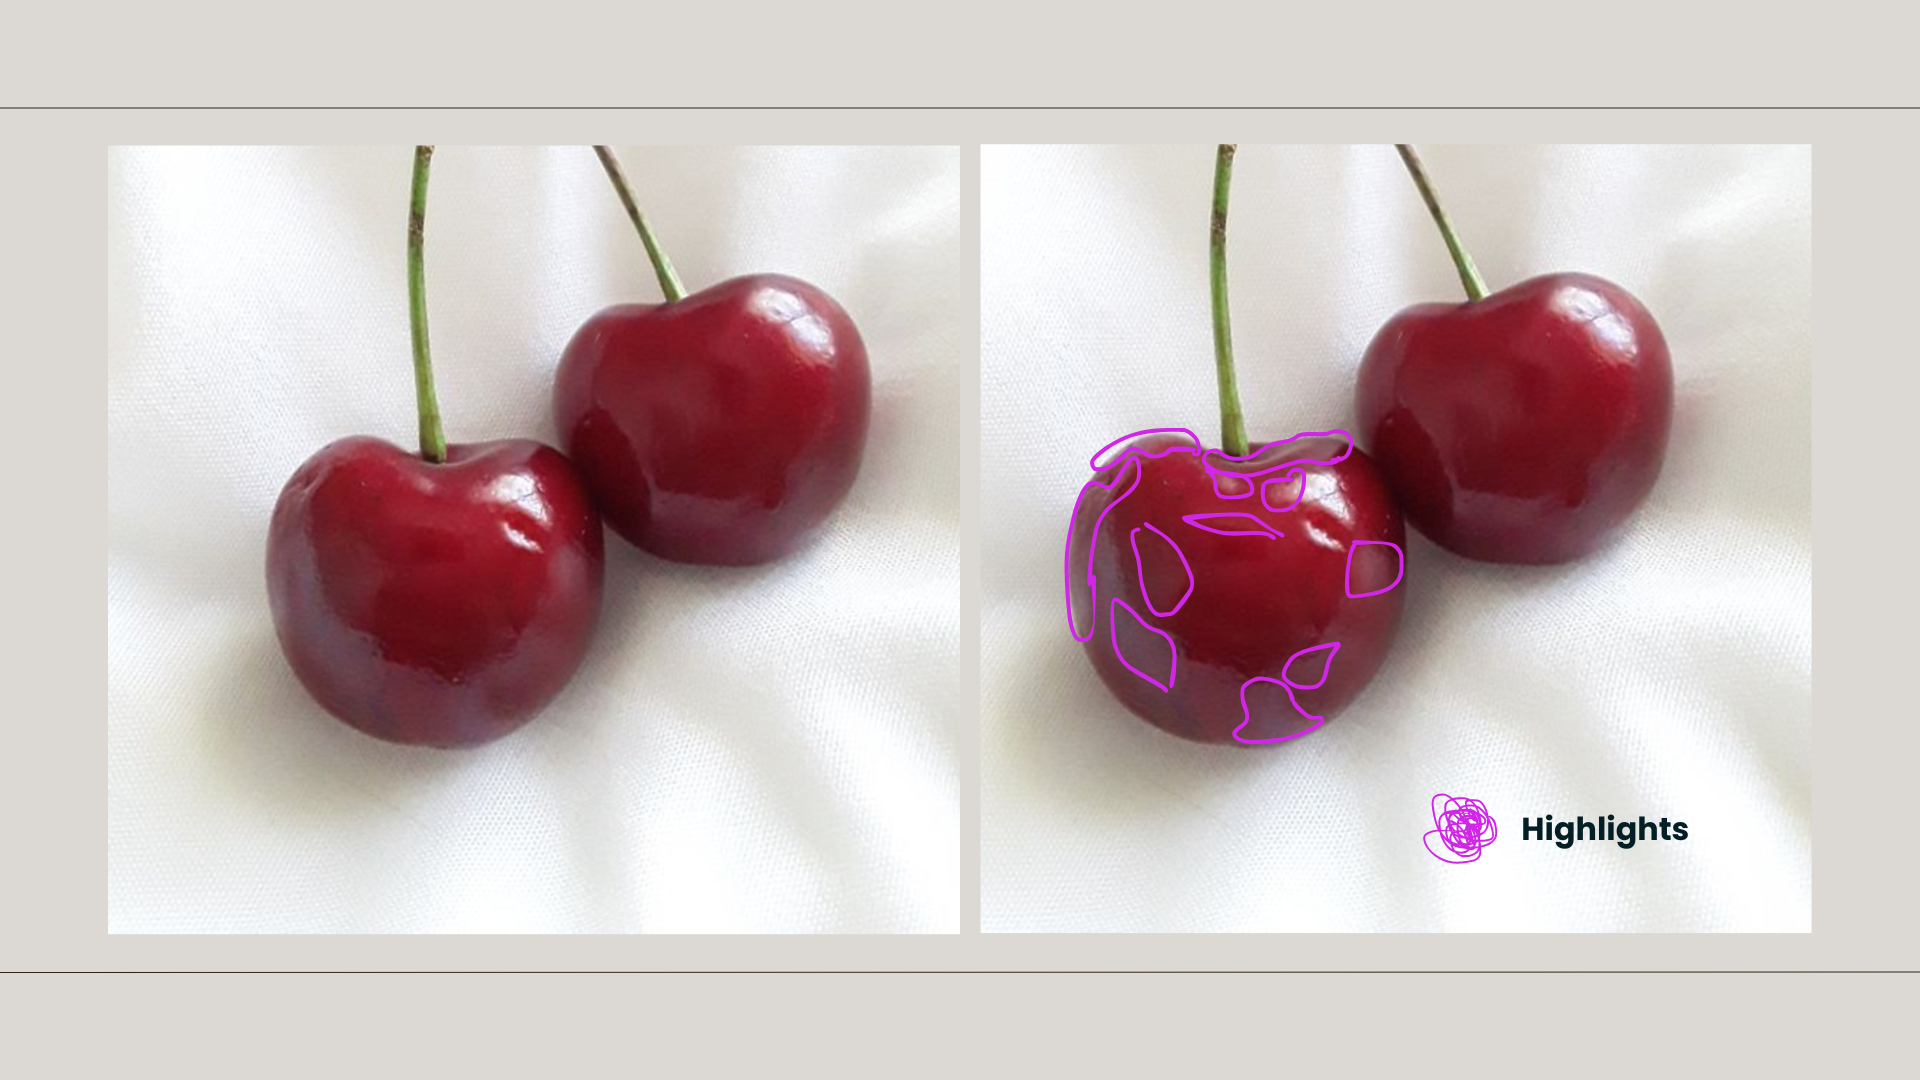
Then medium shapes
Then small details
This is one of the most important beginner painting concepts.
You’re not painting “a cherry” or “a flower” — you’re copying shapes of color from your reference photo.
Start by filling in the largest shapes you see with a flat brush. Once those are in place, you can begin adding shadow shapes and highlight shapes to create dimension.
If you’re unsure of a color at any point, you can always return to Canva and use the eyedropper tool to double-check the color.
You are quite literally copying each shape from your mockup onto the canvas — slowly and intentionally — until you’re happy with how it looks.
If you’re happy with your painting, congratulations!
You just created your first oil painting.
In the next chapter, I’ll show you how to clean your brushes and palette properly so you can keep painting again and again.
Help Keep This Course Free
This course is completely free because I believe learning art should be accessible to everyone.
If these lessons have helped you and you’d like to support the creation of more free tutorials like this, you can leave a donation below. Every contribution helps me continue making educational content and improving this course for future artists.
Thank you so much for being here and supporting my work! It truly means more than you know.